
I saw plain Mache letters at a craft shop and they immediately inspired me: covered with tissue paper with the papier mache technique (paper strips method), then decorated with ribbons, cardboard, buttons, laces – all scraps I have already at home. I made some as a little gift, I hope welcome, for the birth of five beautiful girls.


Oh-My-God! I still haven’t finished my girl’s initial, soon she will do it alone… why not? We will get right on it!
You will need
- Papier Mache Letters – 20 cm
- Plain tissue paper
- Scraps (decorative papers cut-outs, ribbons, buttons, wrapping paper trimmings, salt dough decorations…)


Craft tools
- PVA glue, glue stick
- Paint-brushes
- Scissors, zig zag scissors
- Craft punches (butterfly in my case)
- Glue gun (optional)
- Guillotine trimmer (optional)
How to make
- Tear stripes of tissue paper approx. 2 cm x 6 cm.
- Make up a mixture of PVA glue (50%) and water (50%) and apply to all surfaces of the mache letter with a brush.
- Apply the strips on the glued surface, overlapping strips, but apply only one layer of paper. When you have completed a single layer, let it dry. Repeat with up to three-four layers.
- Cover with the glue mixture and let it dry.
- Using more glue, decorate as your fantasy suggests!
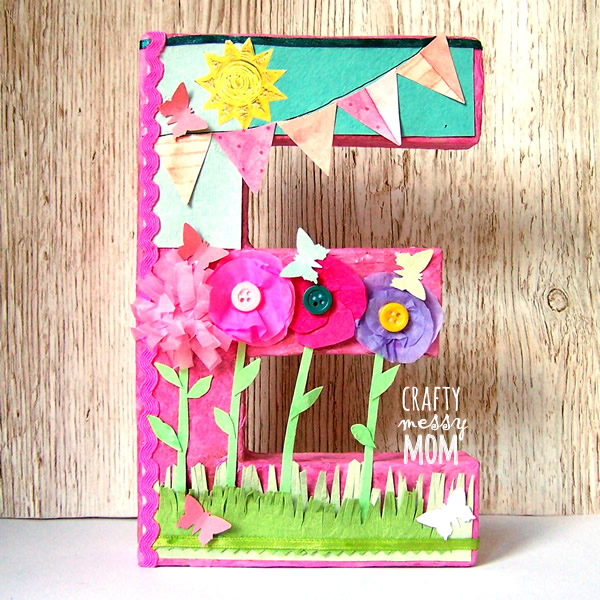
My idea was to recreate a summer garden party: grass, flowers, butterflies and buntings. The paper bunting recalls the fabric one in my daughter’s room.


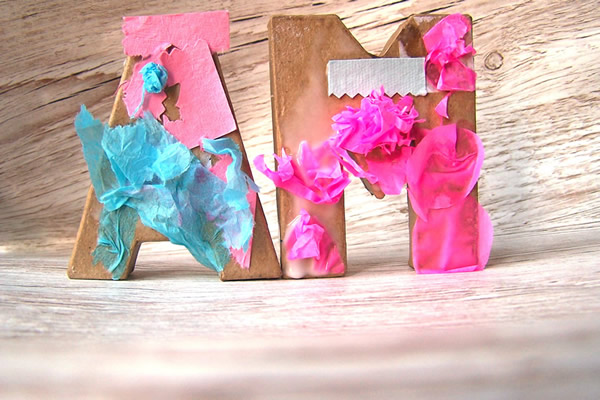
And these are our results, mine and my little one’s!
Let’s get social!
Join in the conversation and see the latest Craftymessymom’s updates on Facebook and Instagram. Find Craftymessymom on Pinterest too!


