
This winter has been rather mild and not a single snowflake has fallen in our town nor nearby. My little girl wished to play with snow so much… This gave me an idea…
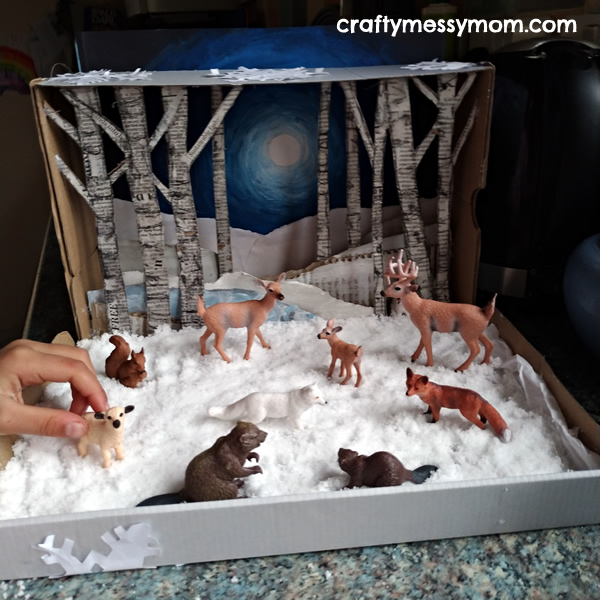
With her help, we created a special snow themed craft to play with: a cardboard winter woodland 3D scene, home for lovely forest animals my girl got as a present. We really enjoyed the process of making it and we are so proud of the outcome that we would like to share how we made it!
This time I could not create printables to download because all the drawings are closely related to the dimensions of your own shoe box. Truly hope you can find the following instructions and images clear and useful.


How to make it
Materials
A shoes box, white tissue paper, cardboard scraps, card scraps (white/ grey/ pale blue), a flattened cereal box, old newspapers, white A3 card, black A3 card.

Tools
Scissors, cutter, PVA glue, glue stick, glue gun, paint brushes (large and small), ruler.
Art media
Tempera/acrylic paint (white, blue, optional black), charcoal, pencil.
Art techniques
Painting, splatter painting, torn paper collage.
Steps
1-Preparing the layers
After collecting the materials we needed – all recycled stuff we had already at home, such as an old newspaper, a cereal box, some cardboard and card scraps – we started creating the papers for the layers.
The trees
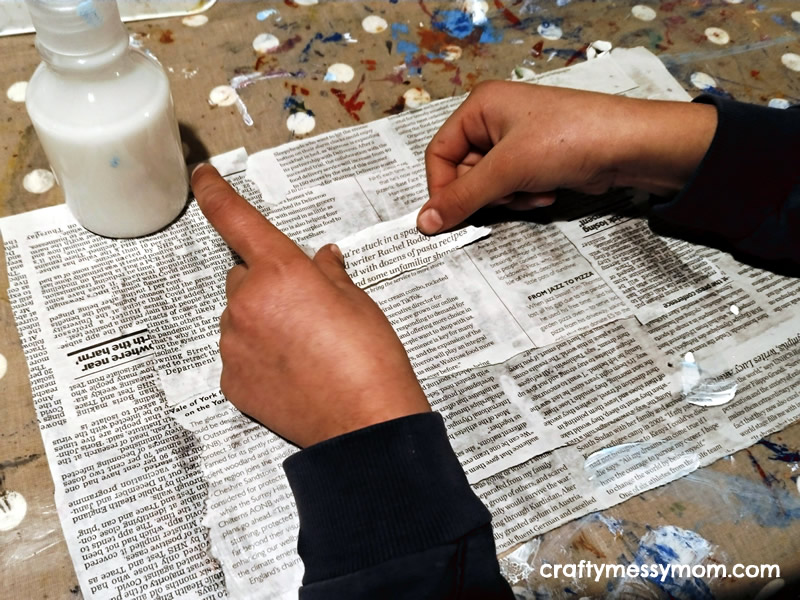
Flatten the cereal box and cover the raw side with PVA glue, using a large paint brush. Tear stripes of newspaper pages (only with text, without images for a better result) and apply them on the cereal box. Once dried, sketch the trees on it using charcoal. Cut the silhouettes of the trees. For the branches you will need a cutter instead of scissors.
In the two sides I made the foreground trees, and I used the middle part to create thinner trees for the background.

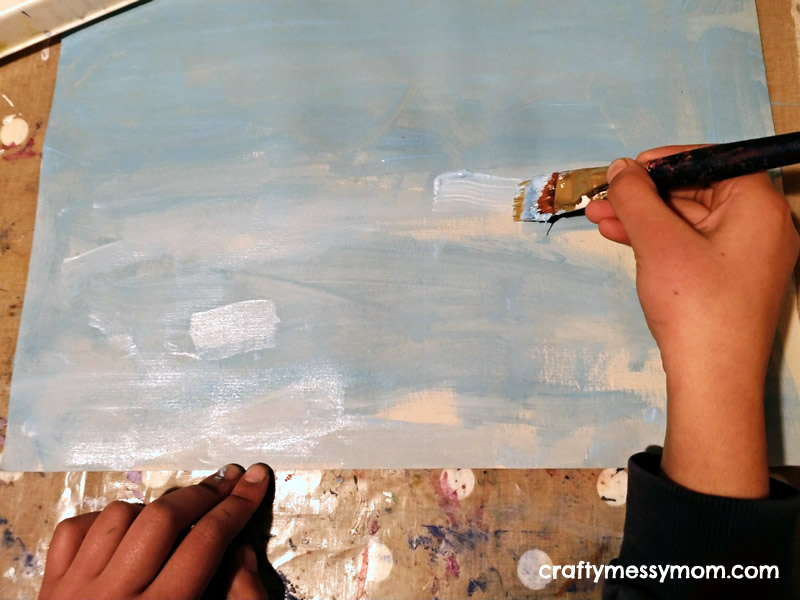
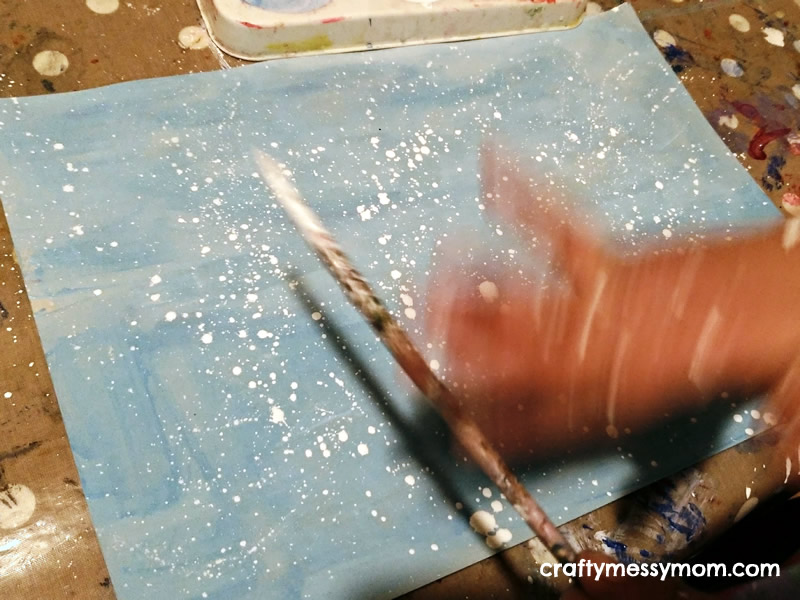
Background: two skies!
The background is reversible from a snowy day to a clear full moon night!
For the day sky, paint in light blue an A3 sheet of white card, once dried add drops of quite liquid white paint simply patting on your brush (I am sure your children have already used the splatter paint technique before 😊). Let it dry. It will look like falling snow!
For the night sky, use a black A3 card, if you don’t have it, paint it entirely in black. Add blue paint in circular brushstrokes, adding white as you move toward the centre. The centre should be completely white.
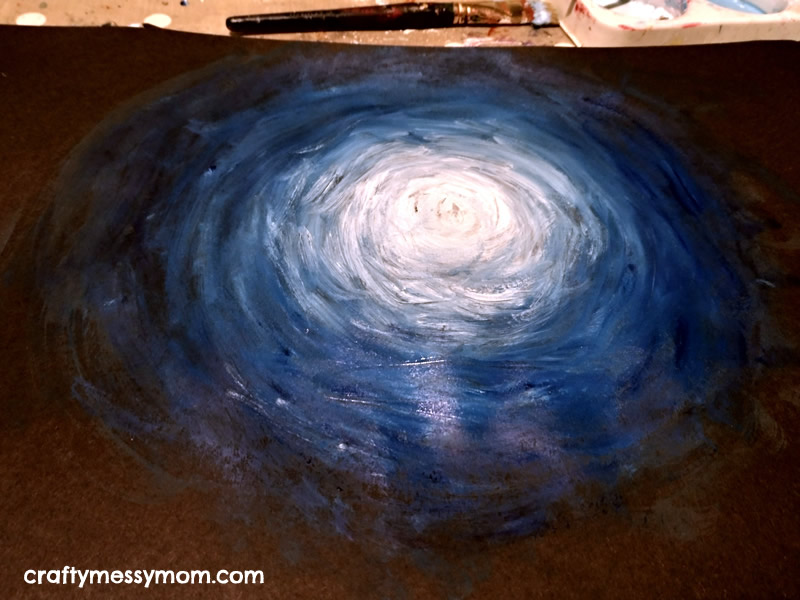
Once dried, we glued a white paper circle (the moon) in the middle.
Snow layers
Paint in white the cardboard scraps; make patterns on white/grey/pale blue card using tempera or acrylic paint with a small brush. Tear long pieces of paper so that they look like snowdrifts. Consider creating enough snowdrifts for 4 layers, starting higher on the back and shorter as you move forward.
2-Assembling the layers
Using a ruler, divide the long bottom side of the shoe box in 4 rows, drawing 4 lines from side to side, leaving 3 mm from the back edge (the two skies will be inserted in this space). These are the guides for the snow layers. Starting from the back, spread a long line of glue (using the glue gun) and attach the background snowdrift (the highest). Attach all the snow layers. In the foreground attach the trees gluing their bottom, top and sides. We put then other layers of trees simply gluing them on the front or back of the snowdrifts.

3-Inserting the skies
Using a cutter, cut a line from side to side in the top back edge of your shoe box. Cut the two skies in the same width of the cut, hight 3 cm taller than your box. The extra part of each sheet is used to handle the two skies. Insert the two skies, and enjoy replacing them as you like!
4-Adding the snow in the foreground
You can use the lid of your shoe box to create a clearing covered with snow! We simply made it gluing (glue stick) white tissue paper in a rather rough way, because the final effect is more realistic and beautiful.
5-Decorating the box!
As a final touch, we created lovely paper snowflakes that we attached to the outer box surface. Here how to create simple paper snowflakes.

What do you think of the outcome?
My little girl was involved in all the steps, from preparing the paper layers, to decorating the box, from tearing paper to using the glue gun (her favourite activity! under my constant supervision) leaving to me only the drawing and cutting of the trees and painting the night sky… 😊
We had lots of fun in making it, and love how it turned out! Now my little girl is having a great time imaginatively playing with it.
And the fun continues… with fake snow!
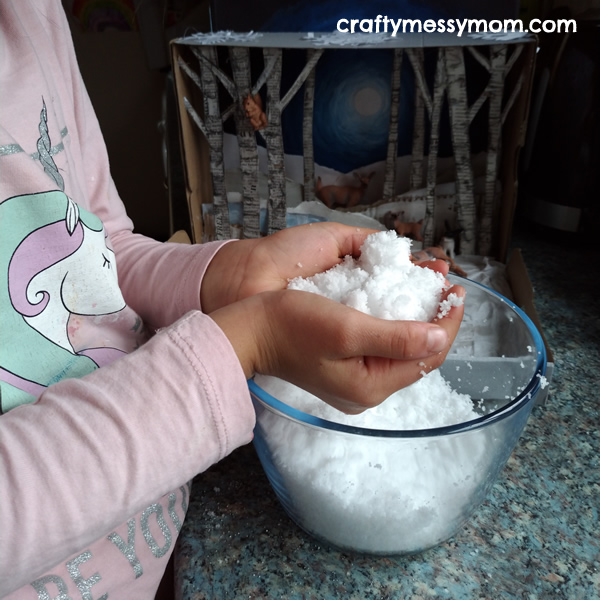
I offered my little girl instant snow and she just added water to have a pot of wonderful, magic, fluffy snow! However, you can make a completely natural and taste-safe snow recipe for sensory play suitable for younger children!
Snow recipe
2 cups baking soda, 1 cup cornstarch, 1 cup white sugar, 8 tbsps cold water. Mix and scrumble all the ingredients.
This is a completely natural recipe, that you children can use safely on the diorama, if you don’t mind adding a little bit of mess in your beautiful, just created setup. It was built for their play, doesn’t it? 😉
Let’s get social!
Join in the conversation and see the latest Craftymessymom’s updates at instagram.com/craftymessymom and facebook.com/craftymessymom. Find Craftymessymom on Pinterest too


