I took part of a wonderful collective craft project held by the Museum of Zoology, University of Cambridge, the
Patchwork Map Project.
The aim was to create a map of the world of 66 squares, 20 x 20 cm each, with at least one animal attached on it to choose among those living in that particular area of the Earth.
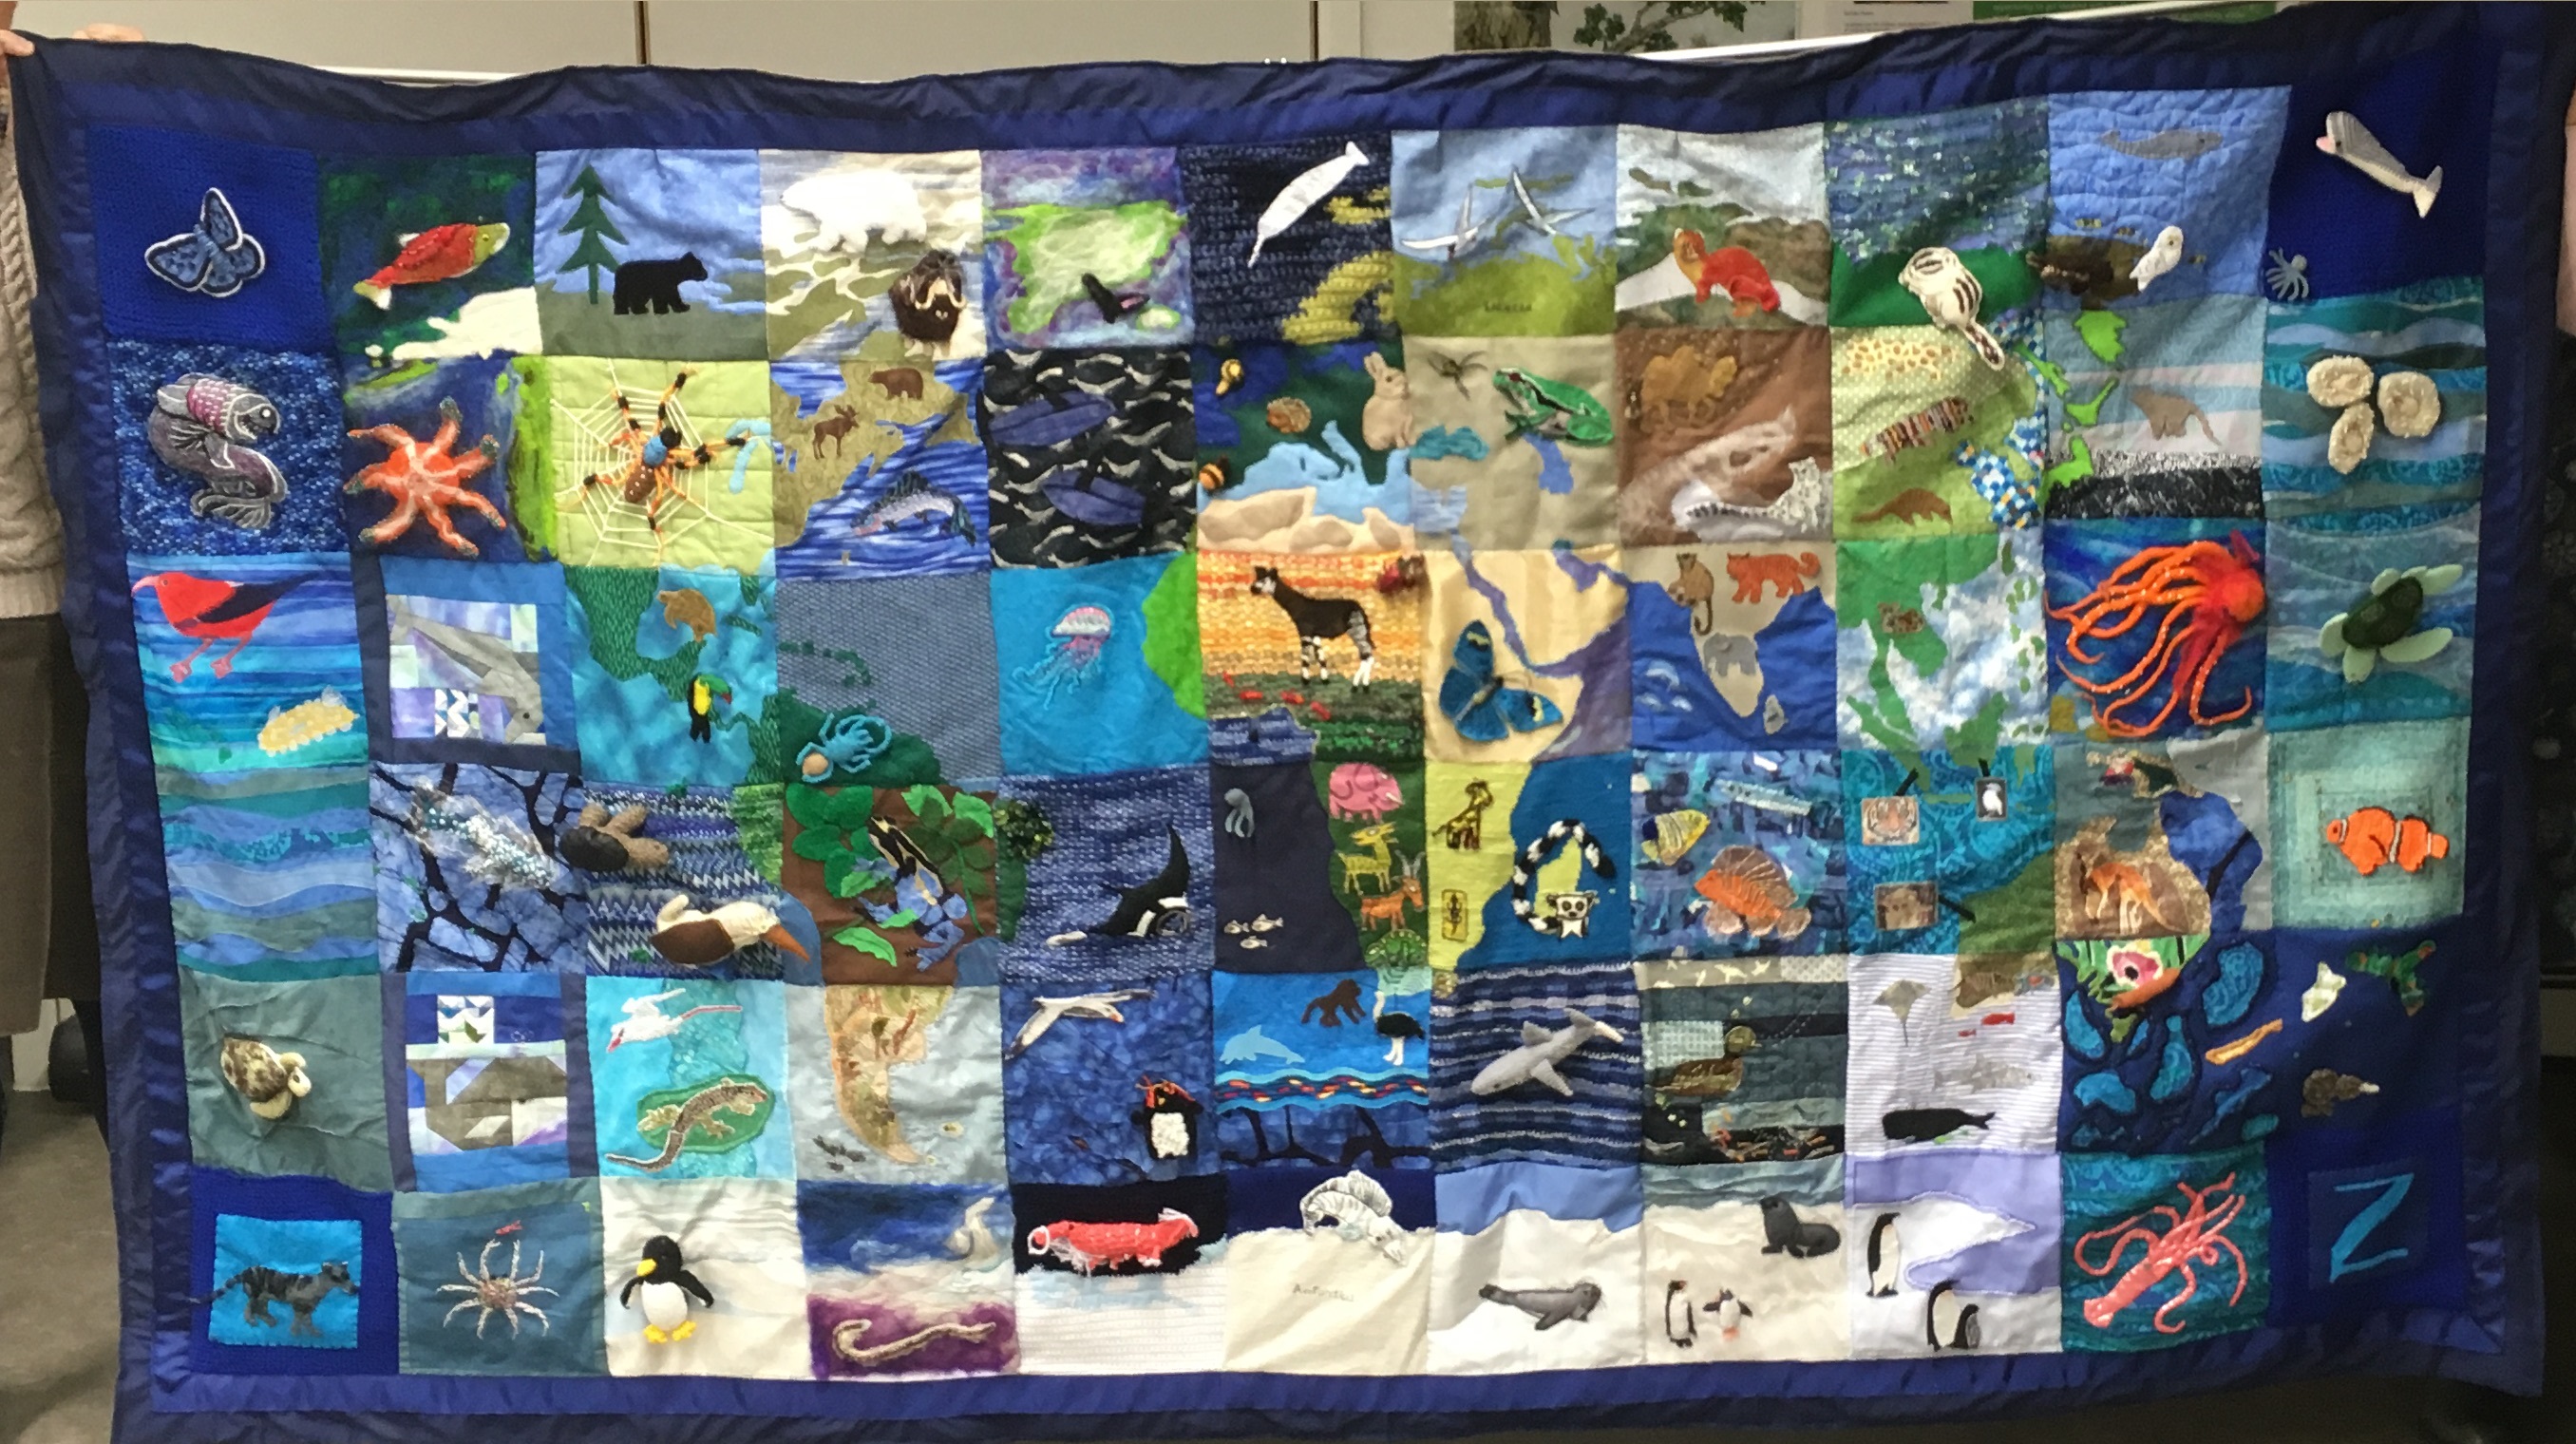
Patches and animals could be made out of any craft technique using fabric or stitch: quilting, patchwork, embroidery, crochet, knitting, applique, a mix of those. The final result, a patchwork map, is now used during school sessions and workshops at the Museum of Zoology.
Patchwork Map project: 1 out 66!

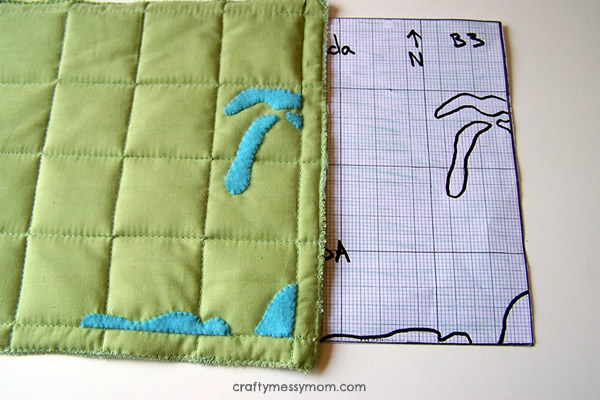
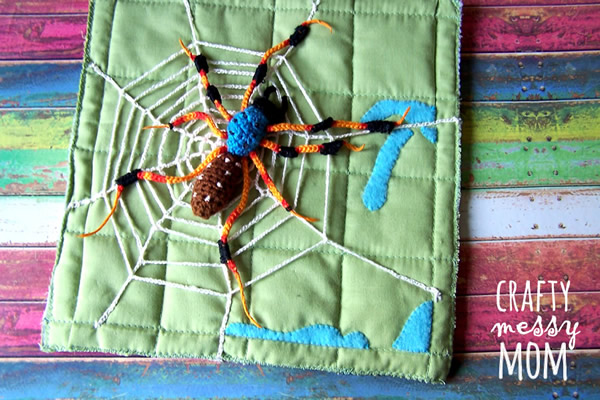
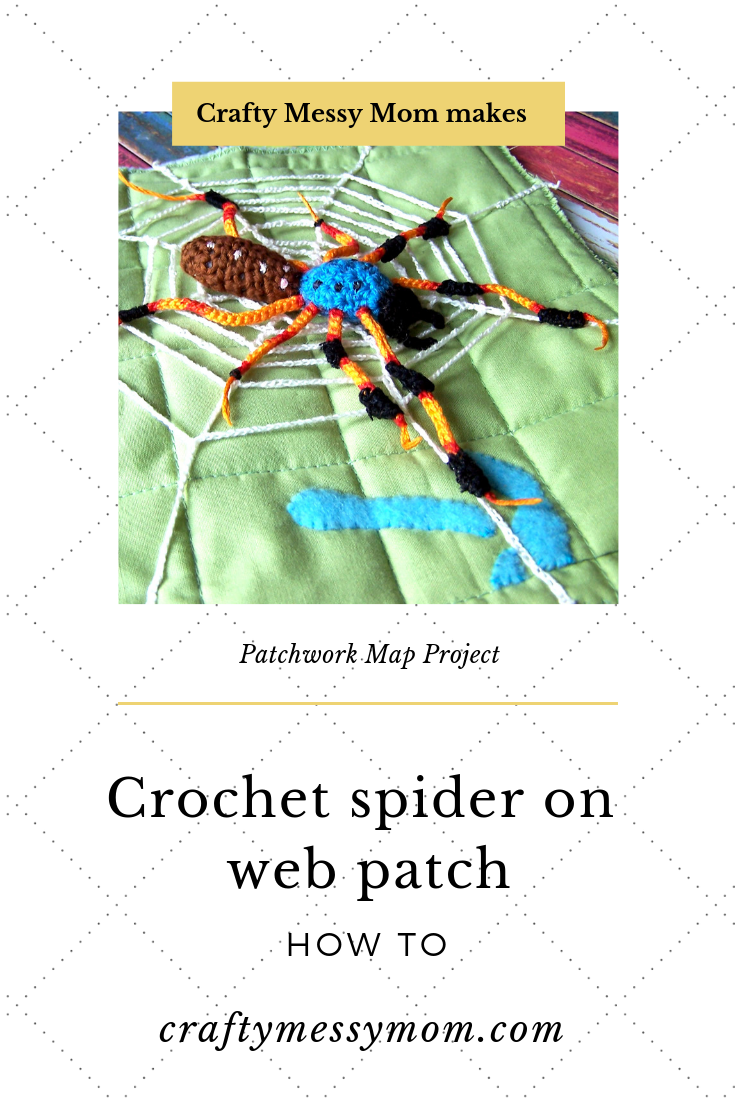
I was given the square B3, the heart of USA and Canada. The suggested animals were: a snake, an eagle, a racoon, an American alligator, an antelope and a spider. A magnificent Golden Orb Weaver spider inspired me so much! My contribution to the project is a
crochet spider on its web on a mini-quilt. I loved to craft it and now I share with you how I made it.

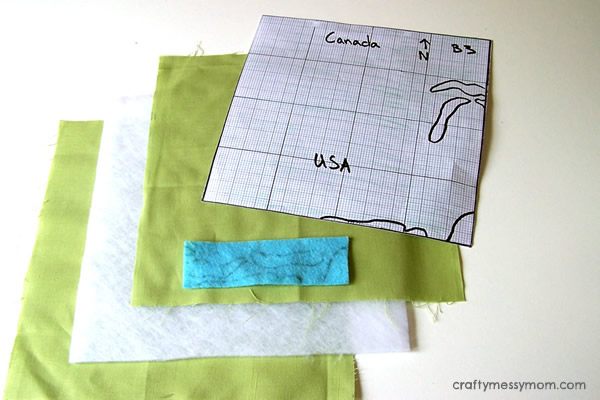
Materials
- 2 layers of 23 x 23 cm green fabric
- 23 x 23 cm thin batting
- light blue felt scraps
- green thread
- light blue thread
- brown, black, turquoise, yellow, white crochet yarn
- stuffing
Craft tools
- sewing machine
- dressmaking scissors

- precision scissors
- needle and pins
- crochet hooks
- PVA glue and brush
- red permanent marker
How I made the patch
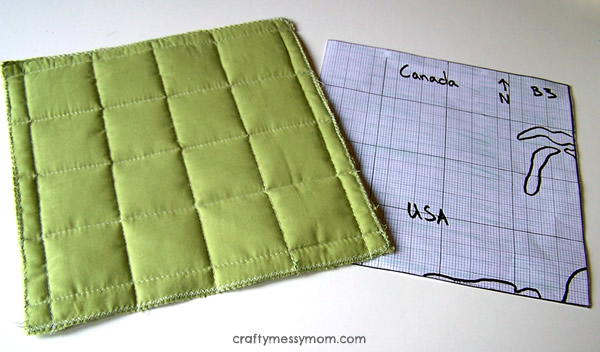
As my assigned square was a bit flat – an area mostly green with a few pieces of lakes and sea in a corner – I decided to make it more stylish by
quilting. I started cutting the fabric and the batting, then I paired the 3 layers and marked the quilt lines exactly as the map grid ones. Finally I sewed horizontal and vertical lines, and the edge. The lakes are made of light blue felt, that I hand-sewed. Ta-dah: here is my mini quilt!
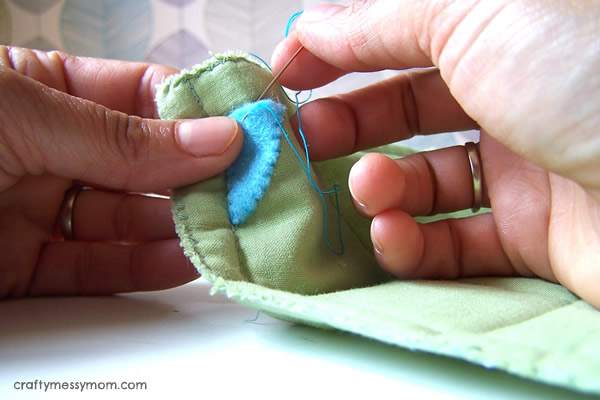
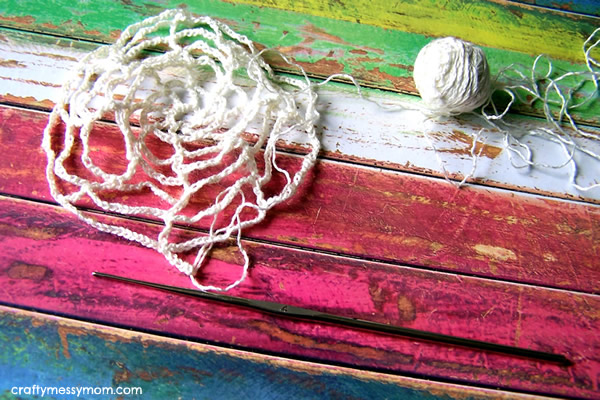
How I made the spider web
Found in the internet a free crochet spider web pattern, I started following the instructions, but at the end I made the web wider and more irregular to make it more real! Firstly I pinned it to the patch, then I fixed it to the mini-quilt with some stitches.


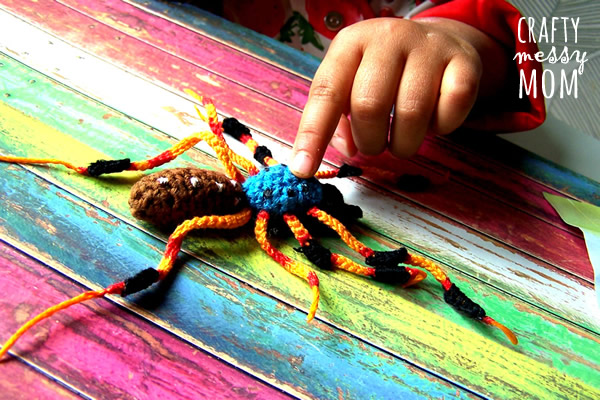
How I made the spider
I crocheted the spider parts – abdomen, thorax, legs and head with fangs – individually, then I attached them with hand stitches. To make the spider legs more realistic, I added some black crochet sleeves and splashes of red using a red permanent marker and I hardened the claws with some glue. Lastly, I embroidered black and white spots on the body.
Firmly secured to its spider web on the patch, my Golden Orb Weaver is ready to go to the Museum of Zoology and entertain (or scare?) kids.
My little girl doesn’t seem very scared by the spider, what about yours?
Let’s get social!
Join in the conversation and see the latest Craftymessymom’s updates at
instagram.com/craftymessymom and
facebook.com/craftymessymom. Find Craftymessymom on Pinterest too!
If you like this post, share it!
Related
Published by Marzia Falcioni
Hi! I am Marzia. Creative maker and visual artist. Love for paper collages, painting, cooking and crafts for/with kids.
View all posts by Marzia Falcioni


So proud of my wife exhibiting this piece of art craft at the Cambridge zoology Museum 🙂 Well done!
Thank you so much!!!
Marzia, I love this project! I think it is a great way to teach environmental conservation to kids and your work is amazing. Thanks for posting 😉