
After two weeks totally dedicated to Halloween crafts, food and costumes, we are back to our Autumn arty crafty play using mostly leaves.
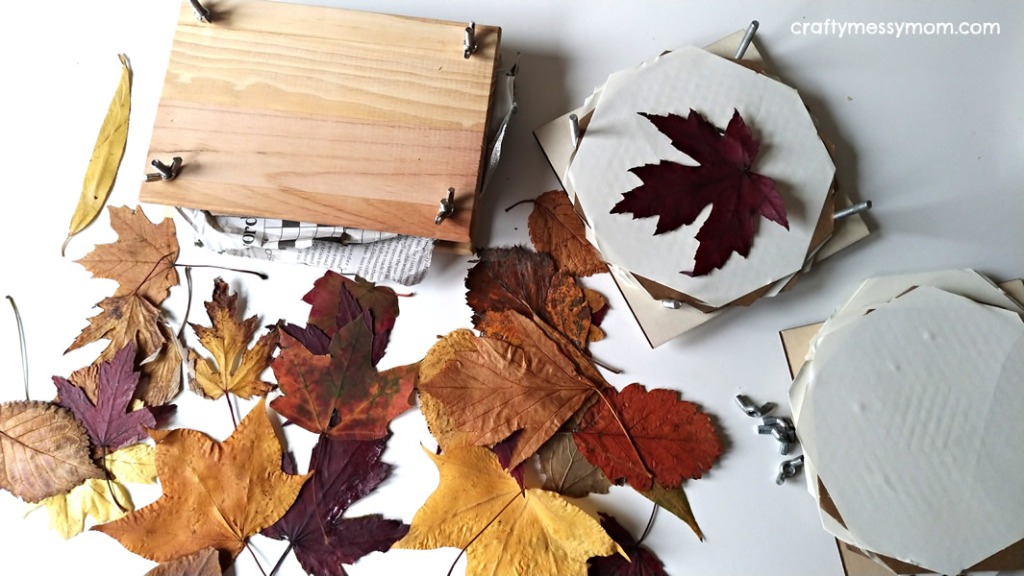
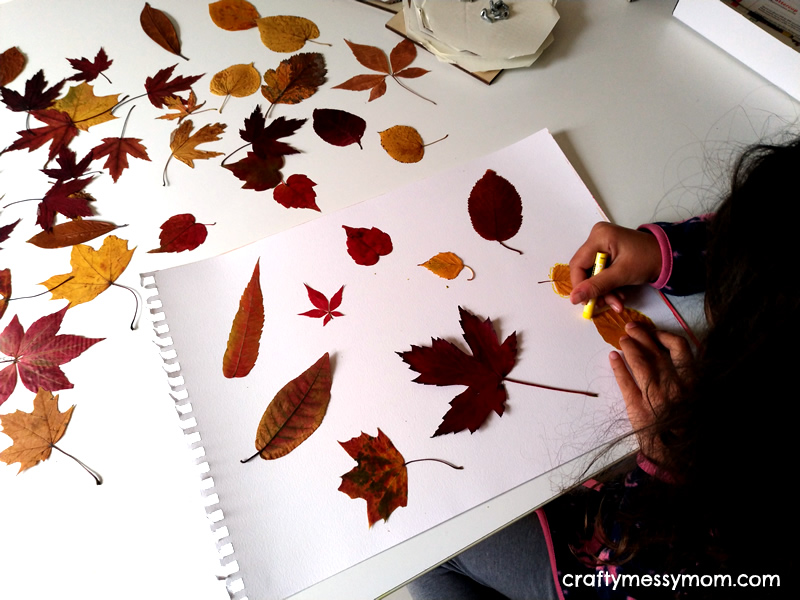
During our walks we collected a myriad of Autumn leaves, in all shapes and colours. Then we pressed most of them, thinking to preserve their amazing shades. It worked for the most, but unfortunately not for the mesmerizing red of maple leaves that has darkened.
We used two flower presses but the old-fashioned method of putting leaves between the pages of a book and putting a weight on it still works perfectly!
These beautifully coloured leaves inspired us so many art and craft activities that we do have to share with you! Here are the most beautiful creations of ours.
1. Autumn leaf butterfly wings
Missy is fascinated by butterflies, she draws and paints them almost every day, so when I proposed to her to create butterfly wings to wear she jumped of joy!

Materials
Leaves (better if pressed), 2 A3 black card, 2 A3 pouches, A3 laminator, scissors, cardboard scrap, elastic straps, strong tape, glue gun.
How to


Draw and cut the wing outlines out of black paper. Insert one black paper wing outline and some pressed leaves into an A3 pouch. Repeat for the second pouch.
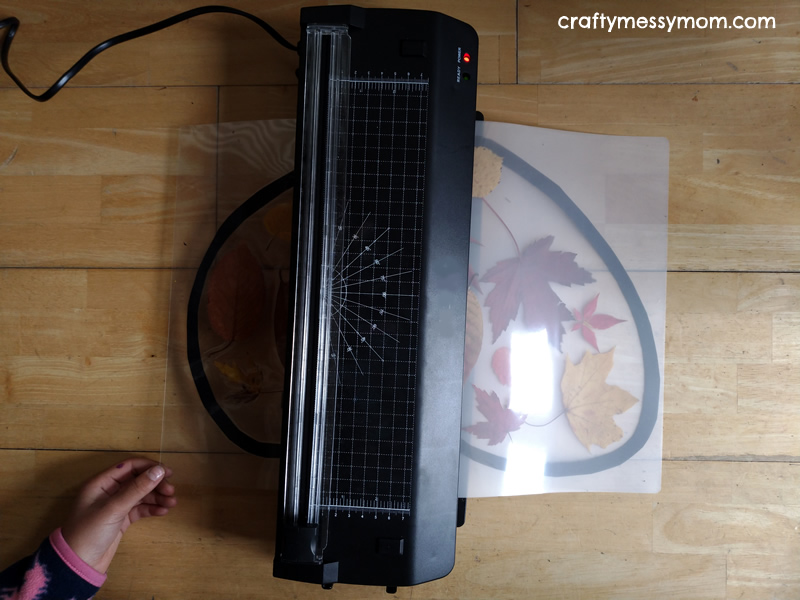

Laminate each of them. Cut the wings leaving a border of about one centimetre with the black wing outline.
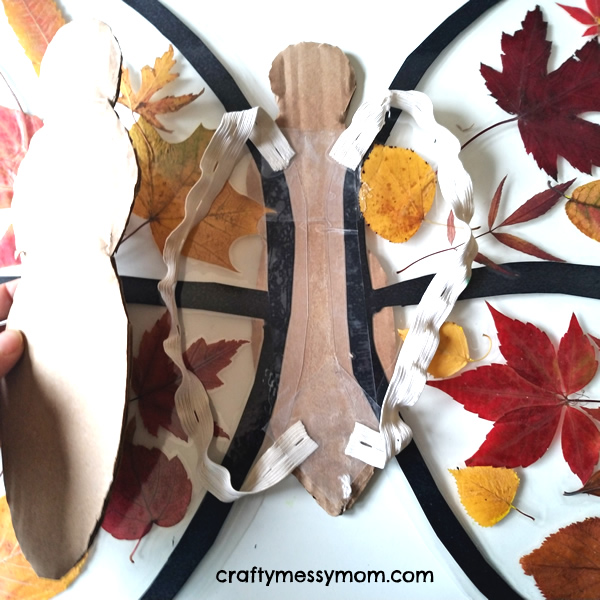
Cut two identical butterfly body from a scrap of cardboard. Attach the wings to one cardboard butterfly body together with elastic straps. Glue the second cardboard butterfly body.

Here are our leafy butterfly wings! We loved how they turned out!
2. Scratch art Autumn leaves
We tried our first DIY scratch art project using our pressed Autumn leaves as templates. It was fun and easy to do, many others followed!

Materials
Leaves (better if pressed), white card, oil pastels, black acrylic paint, paintbrush, toothpick.
How to
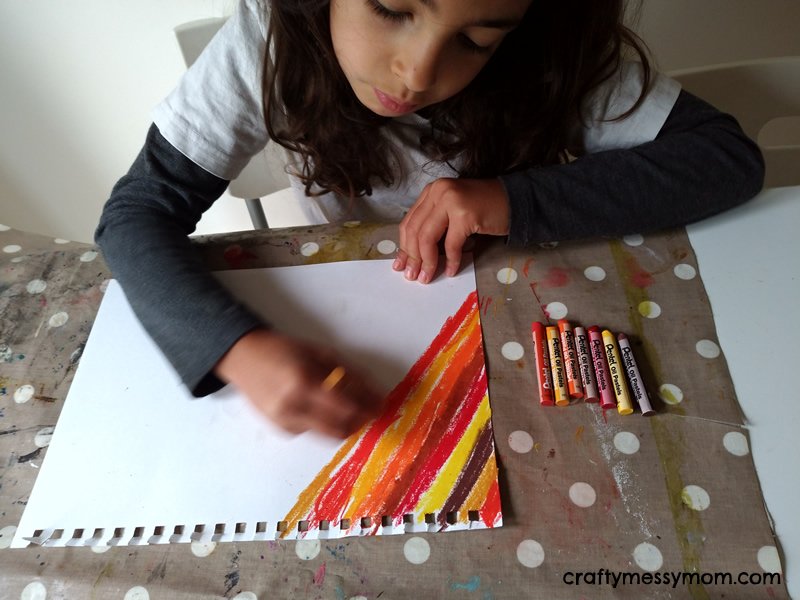
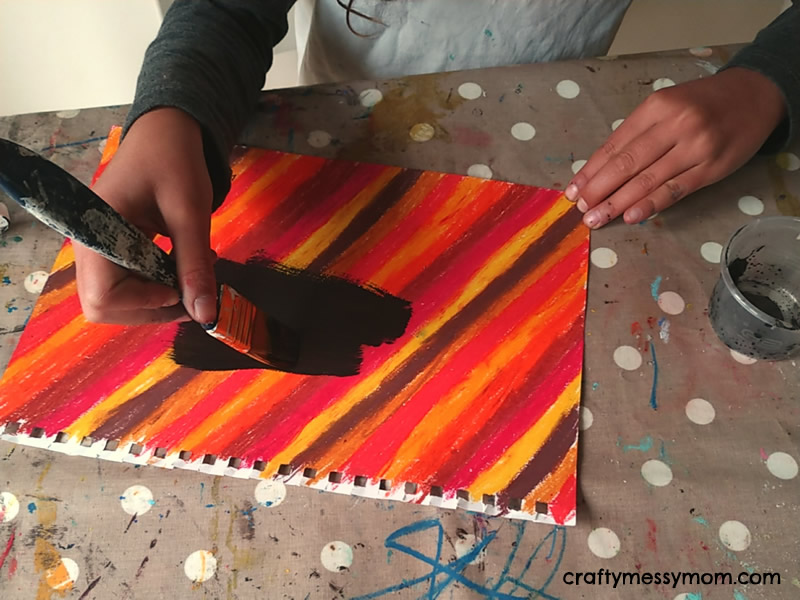
We used oil pastels, with their bold and bright tones and buttery texture, to fill a white sheet of card. Missy opted for an Autumn rainbow pattern. Then we covered it with black acrylic paint.
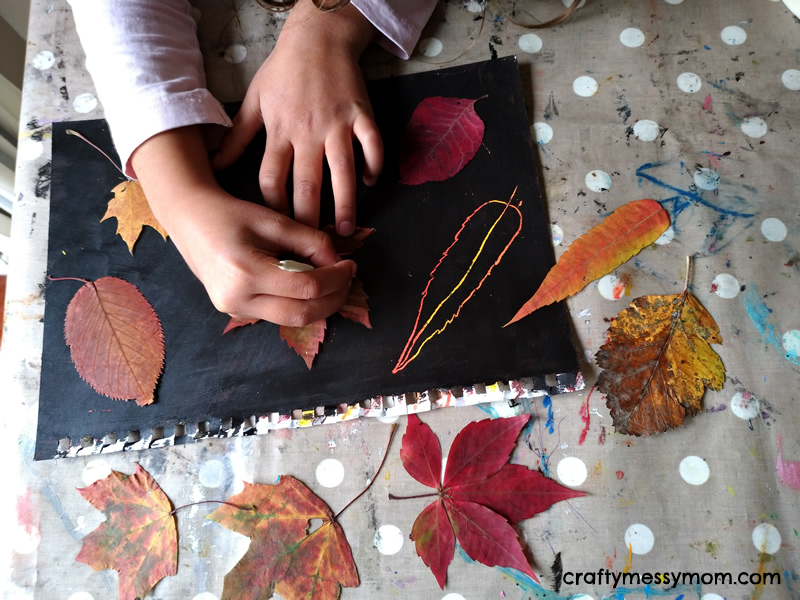

Once dried, Missy chose some previously pressed leaves to make a composition and used them as templates for scratching outlines with a toothpick. Finally, she added fine details to the leaves.
She is very proud of her artwork, made independently from start to finish!
Running out of ideas for filling in a blank sheet of paper with oil colours? Have a look at the post Geometric drawings with oil pastels.
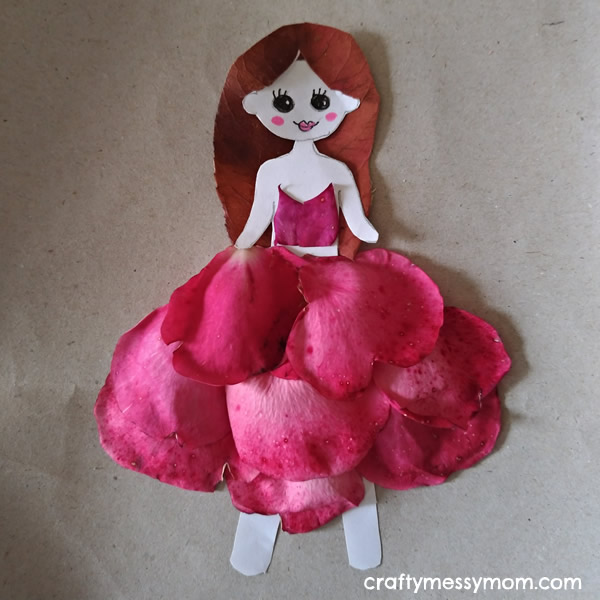
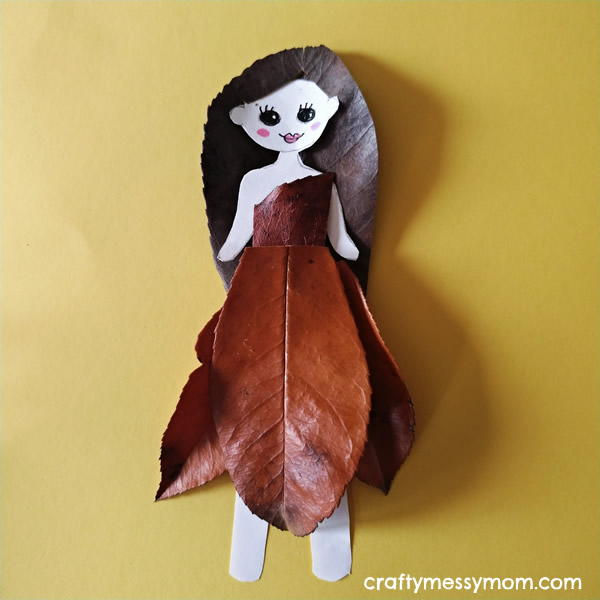
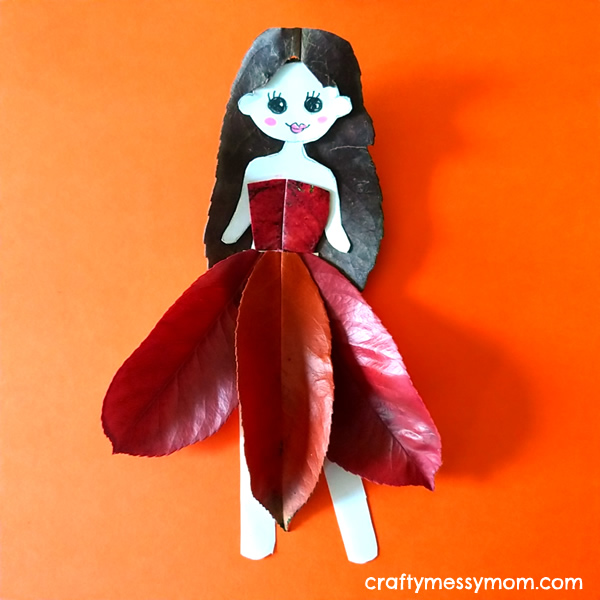
3. Leafy paper dolls
Missy loves making paper dolls and their outfits, and playing endlessly with them! We made an Autumn version of them using colourful leaves and petals from the last roses of this year (leaves and petals not pressed). Even if she was only able to play with these lovely dolls for a short time, due to the ephemeral nature of this creation, she loved it!

Materials
Leaves and petals, paper, scissors, markers, masking tape.
How to
Draw and cut a doll about 15 cm tall out of a sheet of paper.
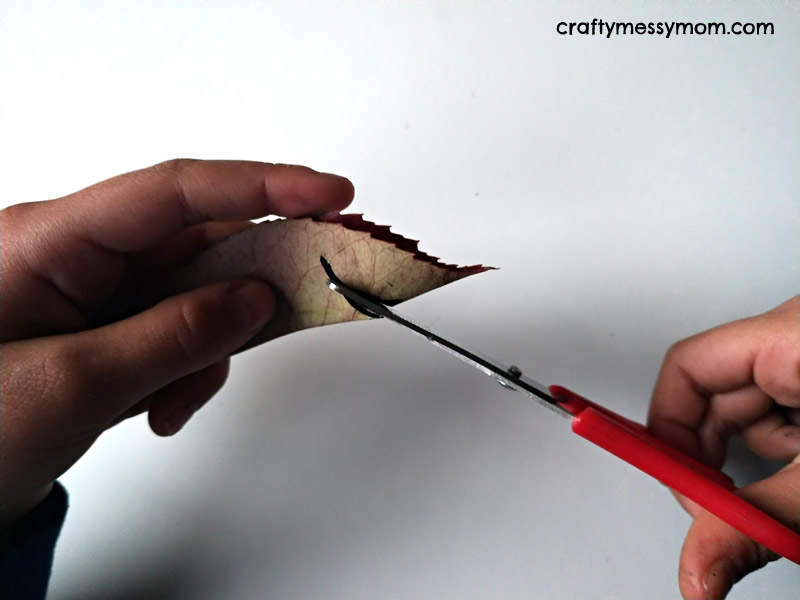

Make the doll’s hair cutting the top of a leaf as you can see in the pictures above, and insert the doll’s head into the cut.
Arrange 3-4 leaves to form a skirt and fix them on the back with masking tape. In the same way create a skirt with petals.
Cut tops out of leaves.
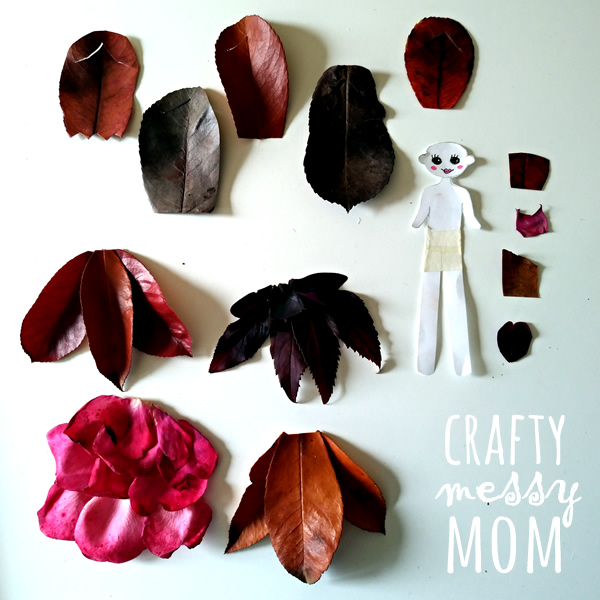

Dress your lovely paper doll with the beautiful Autumn outfits you made!
4. Oil pastels and watercolour Autumn leaves
We love this art technique called Watercolour-resist Art! It combines two completely different art media, such as oil pastels (applied first) and watercolours (applied second). While the watercolour paint soaks into the paper, it just flows off the oil pastel lines, creating an amazing effect!

More info about this technique in the blog The Artful Parent.
Materials
Leaves (better if pressed), oil pastels, watercolours, watercolour paper, paintbrushes, jar with water.
How to

Choose the leaves you like most and arrange them on a white sheet of watercolour paper. Choose a light oil colour – the lighter the shade, the better – and use it to outline the leaves. Remove the leaves and add the details to your drawing.
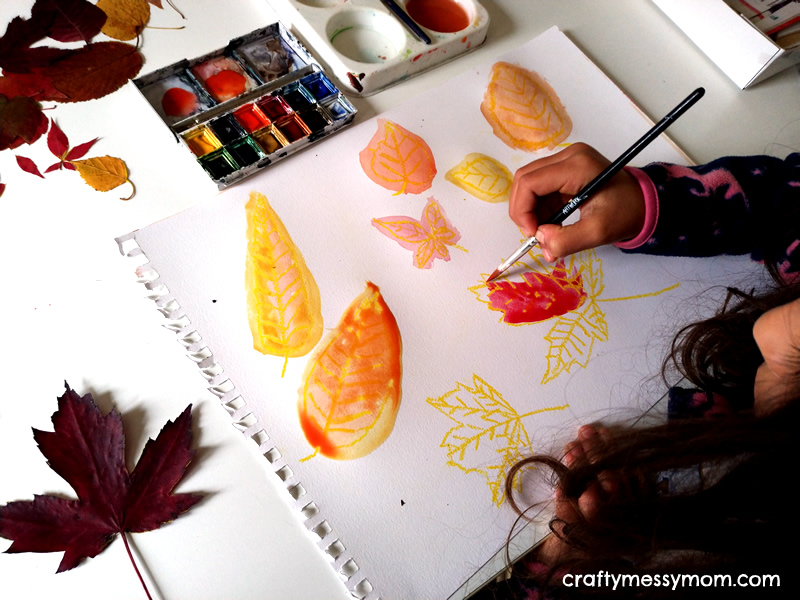
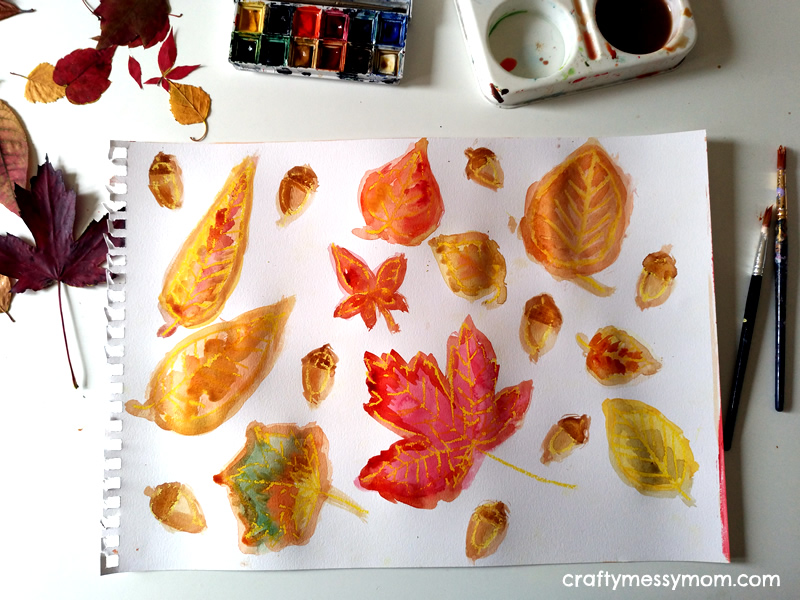
Use the warmest shades of watercolours to colour the leaves. It is not important to colour inside the outlines; on the contrary, if you go out of the contours the oil colours will be highlighted!
Missy used a shade of yellow, resulting in a slight contrast. We tried other shades of oil pastels, and the contrast effects were stronger and more beautiful.
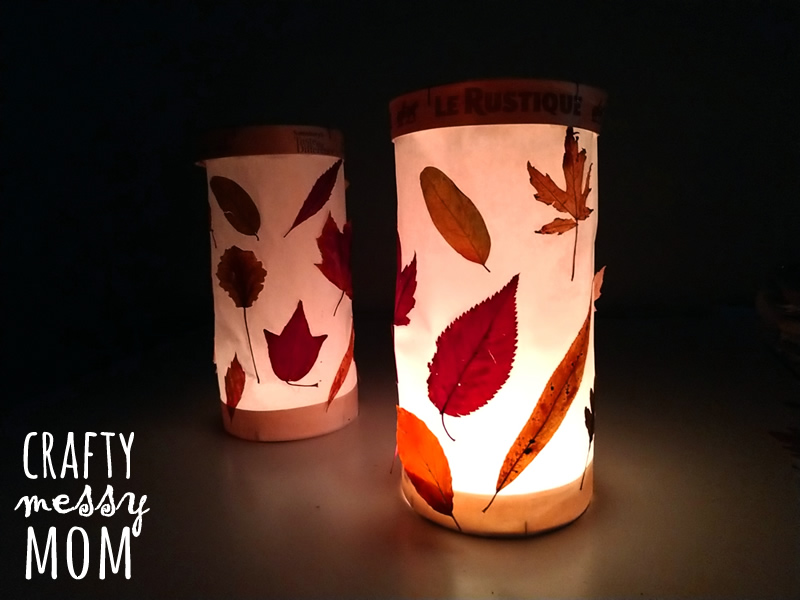
5. Autumn leaf lantern
It is very popular in many countries to make lanterns in occasion of St. Martin’s Day, on the 11th of November. We had lots of fun creating our own and switch them on for a great, warm, glowing effect.
Materials
Pressed leaves, cheese box, white baking paper, glue stick, scissors, electric tea light.
How to
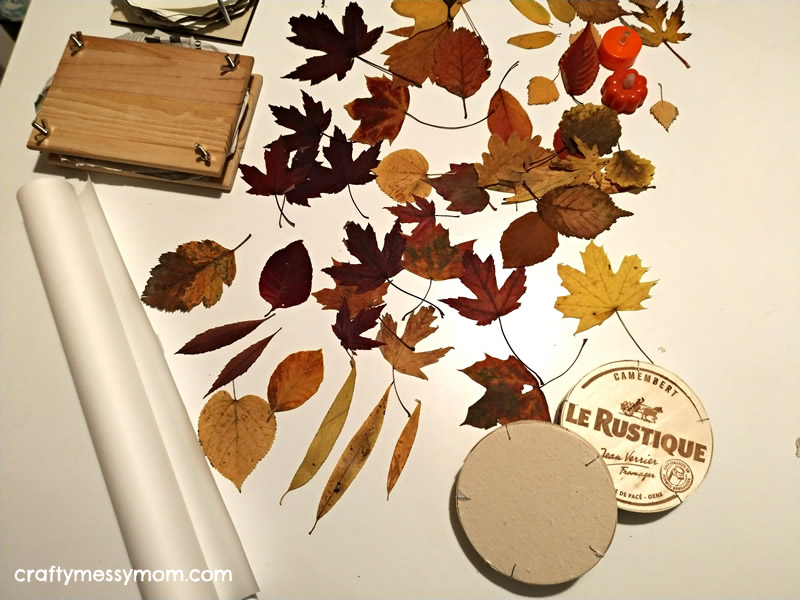
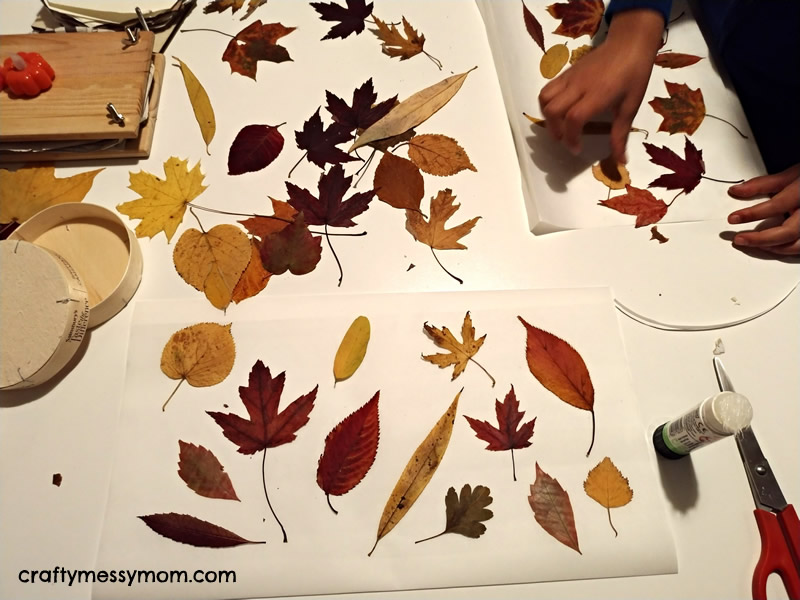
Cut a sheet of white baking paper, size 40×26 cm. Fold the top and bottom edges of about 2 cm, to reinforce them, glue the leaves on one side of the baking paper sheet.

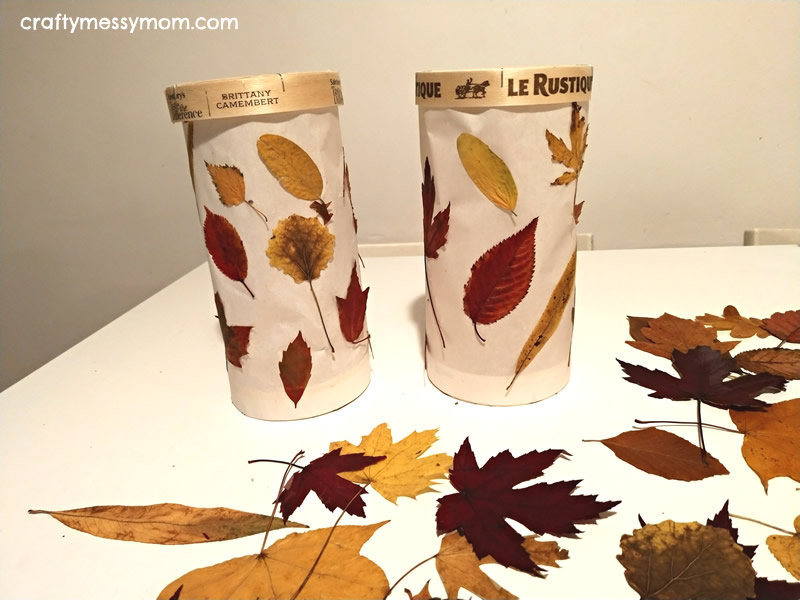
Glue the bottom edge of the paper to the bottom part of the cheese box. Glue the sides of the paper together, overlapping them of about 3 cm. Put the light inside, switch it on ad put the lid of the cheese box on top of your lantern.
We made two, aren’t they beautiful?
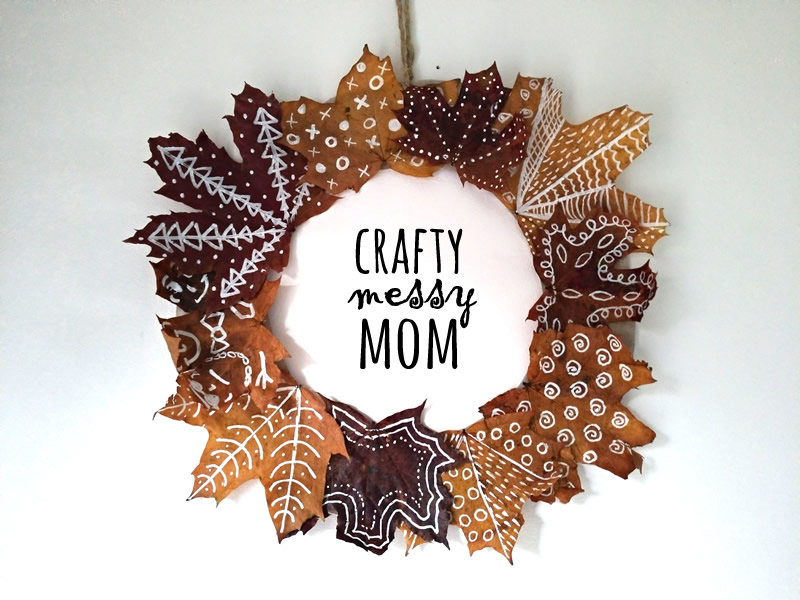
6. Decorated leaf wreath
This is another craft of effect involving Autumn leaves – not necessarily pressed – and recycled material, such as a box of cereals.
Materials
Leaves, white acrylic paint markers, cardboard, scissors, glue stick, hole punch, string.
How to
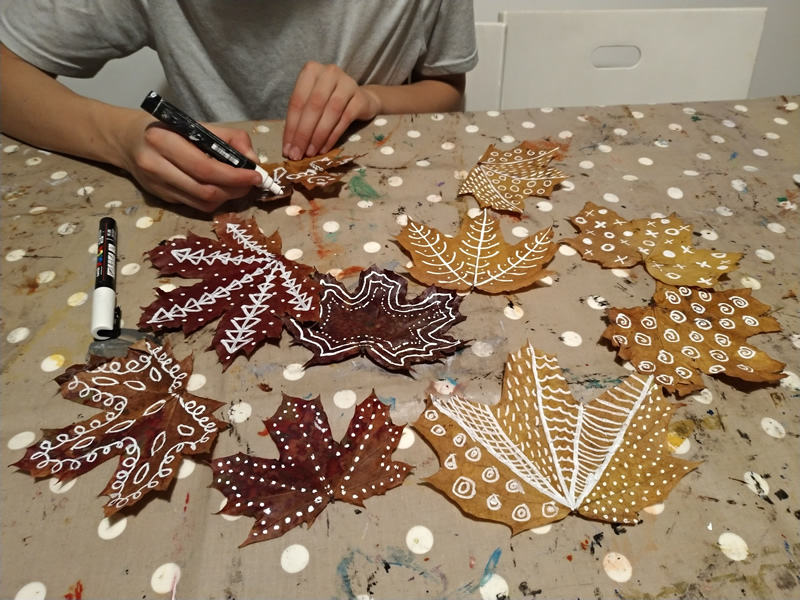
First decorate your beautiful leaves with an acrylic paint marker. We used a white posca pen because the contrast is greater.
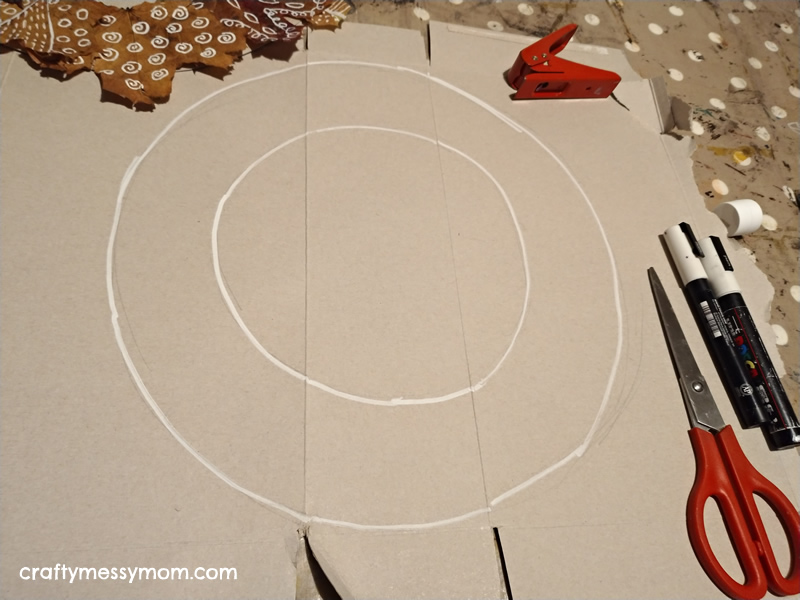
Cut out of a scrap of cardboard a ring, outer diameter 33 cm, inner diameter 20 cm.
Glue your leaves to the cardboard, trying to cover the cardboard.
Punch a hole on the top of the ring and insert the string, making a knot.
Hang it wherever you like!
7. Leaf animal faces/masks
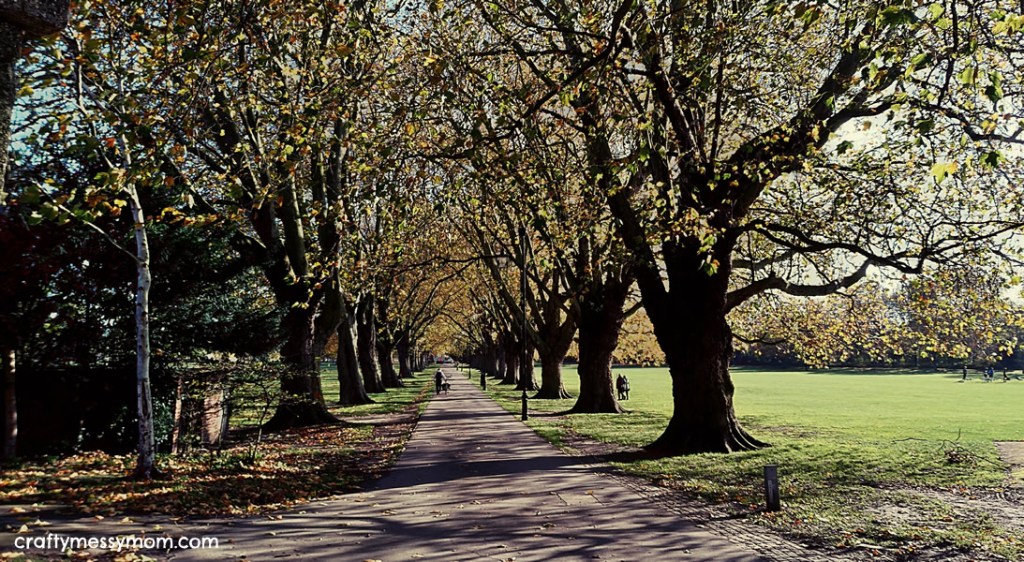
We collected giant leaves from marvellous London plane trees walking in a beautiful park in our town. They inspired us some animal faces.
Materials
Large leaves, black and white acrylic paint markers, scissors, big googly eyes, glue stick.
How to
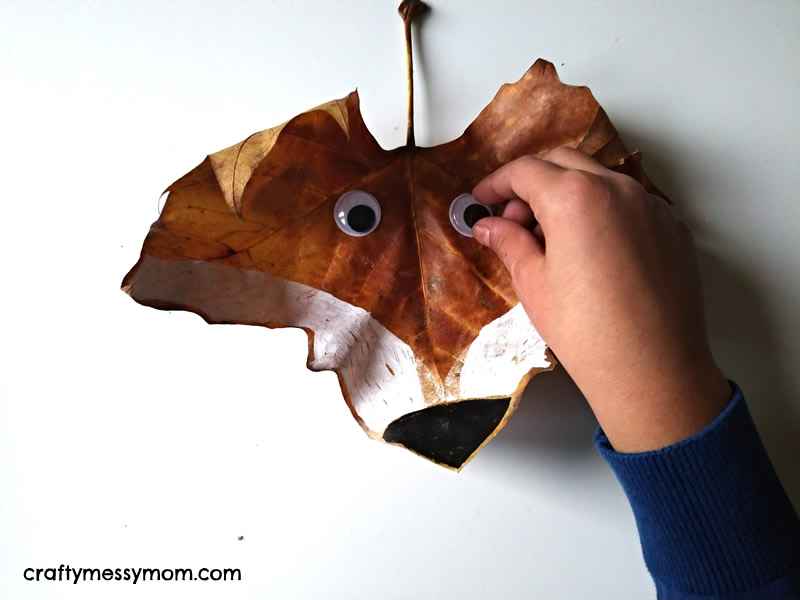
Simply paint the details of the animal faces (nose, ears, whiskers…) using posca pens and cut the holes for the eyes (mask), or glue the googly eyes (face), as we did at the end… 😊

We created three wild animals, a fox, a wolf and a lynx. Aren’t they funny?
Hoping to inspire you in some way, check out on Instagram @craftymessymom for other art and craft activities for kids!
Let’s get social!
Join in the conversation and see the latest Craftymessymom’s updates at instagram.com/craftymessymom and facebook.com/craftymessymom. Find Craftymessymom on Pinterest too!


